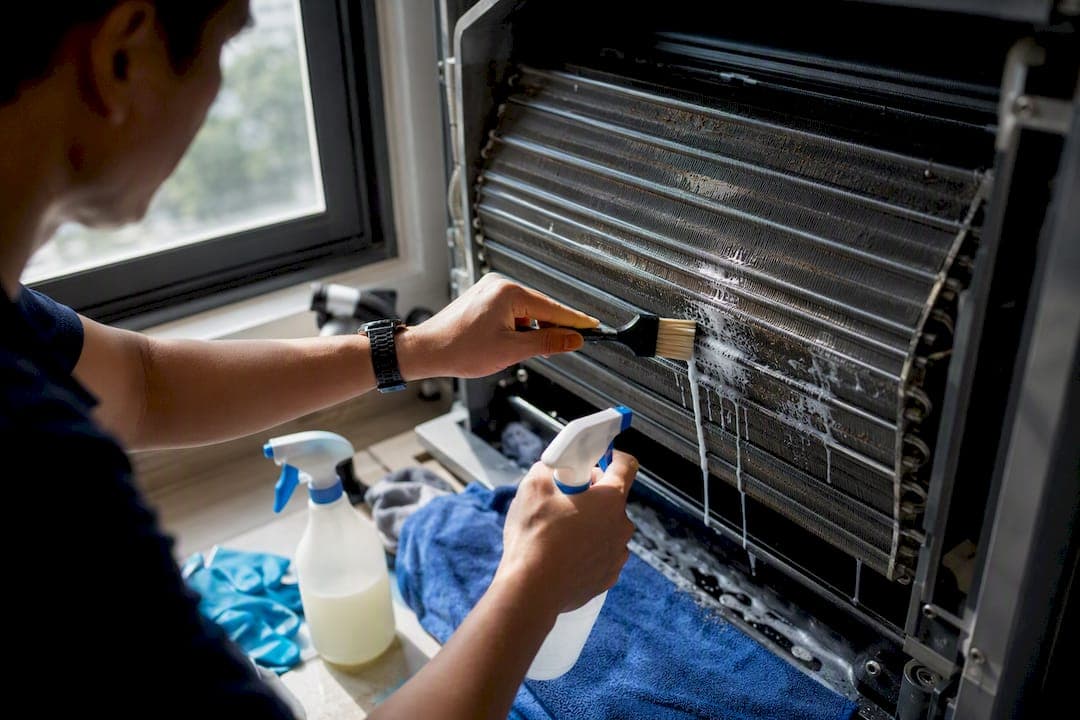
You clean a split system by isolating power, containing the work area under negative pressure, assessing airflow and coil condition, performing Type 1 dry cleaning or Type 2 wet cleaning as the assessment dictates, clearing the condensate line, then verifying the result with a functional test before handover. This sequence follows the NADCA ACR standard and ACCA reconditioning guidance, and it's the standard MyAirCare operators build their job sheets around.
- Visibly clean coil, fan barrel, and filters
- Clear, tested condensate path
- No cross contamination between return and supply sides
- Recorded airflow and temperature drop as proof of performance
This SOP is written for trained technicians running professional split‑system cleans, not for homeowners doing their own filter rinse.
Key Takeaways
Professional air conditioner cleaning succeeds when containment, correct coil method selection, and documented verification are treated as one inseparable process, not optional extras.
| Point | Details |
|---|---|
| Assess before you clean | Check airflow, chill factor, and coil condition to decide Type 1 or Type 2 cleaning. |
| Contain the work zone | Run negative pressure and continuous HEPA vacuum collection throughout mechanical cleaning. |
| Never wet electrical or porous parts | Isolate motors, wiring, and insulation before any wet cleaning step. |
| Verify before handover | Record airflow, temperature split, and photos as proof the job worked. |
| Use MyAirCare for job records | Store before/after photos, automate reminders, and process payments against each booking. |
Table of Contents
- Job sheet checklist for a professional air conditioner clean
- What is the step-by-step SOP for cleaning a split system?
- Which tools and chemicals belong in a professional kit?
- What safety and licensing rules apply to AC cleaning contractors?
- How do you verify a clean actually worked?
- Managing waste, wastewater and the customer handover
- Running a profitable cleaning route without dropping quality
- A practical option for running your cleaning business day to day
- Sources
Job sheet checklist for a professional air conditioner clean
Run this list on every job before touching a screwdriver, and again before you leave site.
Pre‑service:
- Confirm site access and isolate electrical power at the switch
- Set up negative air containment around the work zone
- Visually assess coil condition, airflow, and chill factor at the return and supply
Core cleaning tasks:
- Remove covers, filters, and vanes
- HEPA vacuum first (Type 1); move to controlled wet cleaning (Type 2) only if warranted
- Clean the fan barrel and inspect the motor
- Flush the drain pan and condensate line
Post‑service:
- Reassemble and reseal all covers
- Test airflow and record the temperature delta between supply and return
- Take before and after photos, log job notes, and get a customer sign‑off
The decision between Type 1 and Type 2 cleaning depends on a preliminary visual inspection of the coil for microbial growth or grease build up. Skipping that inspection is the single most common shortcut that leads to callbacks.
What is the step-by-step SOP for cleaning a split system?
Isolate power at the switch, start your negative air containment, and pull the front covers before you do anything else. Everything downstream depends on getting that sequence right.
- Pre‑service assessment. Check airflow at the return and supply grilles, note the chill factor, and inspect the coil face for dust loading, grease, or visible mould.
- Set containment. Establish negative pressure in the work area so contaminants don't migrate into occupied space. Continuous pressure differentials matter more than most technicians assume.
- Disassemble. Remove covers, filters, vanes, and any accessible panels to expose the coil and fan barrel.
- Dry clean first. Run a HEPA vacuum continuously while brushing the coil fins with a soft bristle brush. NADCA requires continuous vacuum collection during mechanical agitation, not intermittent passes.
- Decide on Type 2. If dry cleaning doesn't resolve visible contamination, or microbial growth is suspected, move to controlled wet cleaning. Isolate the motor, electrical connections, and any porous insulation before you introduce liquid anywhere near them.
- Apply chemical treatment. Use a coil detergent rated for aluminium fins and let it dwell before rinsing.
Pro Tip: Rushing the rinse is the fastest way to undo a wet clean. Give the detergent time to break down grease and biofilm on the fins before you flush it. Rinse too early and you just push the residue deeper into the fin pack, where it re‑emerges as odour within weeks.
- Rinse and capture. Flush with clean water and capture all runoff, never letting it drain into ducts or wall cavities.
- Care for the fan barrel and motor. Clean the barrel mechanically; keep water and cleaning agents away from motor windings and electrical terminals entirely.
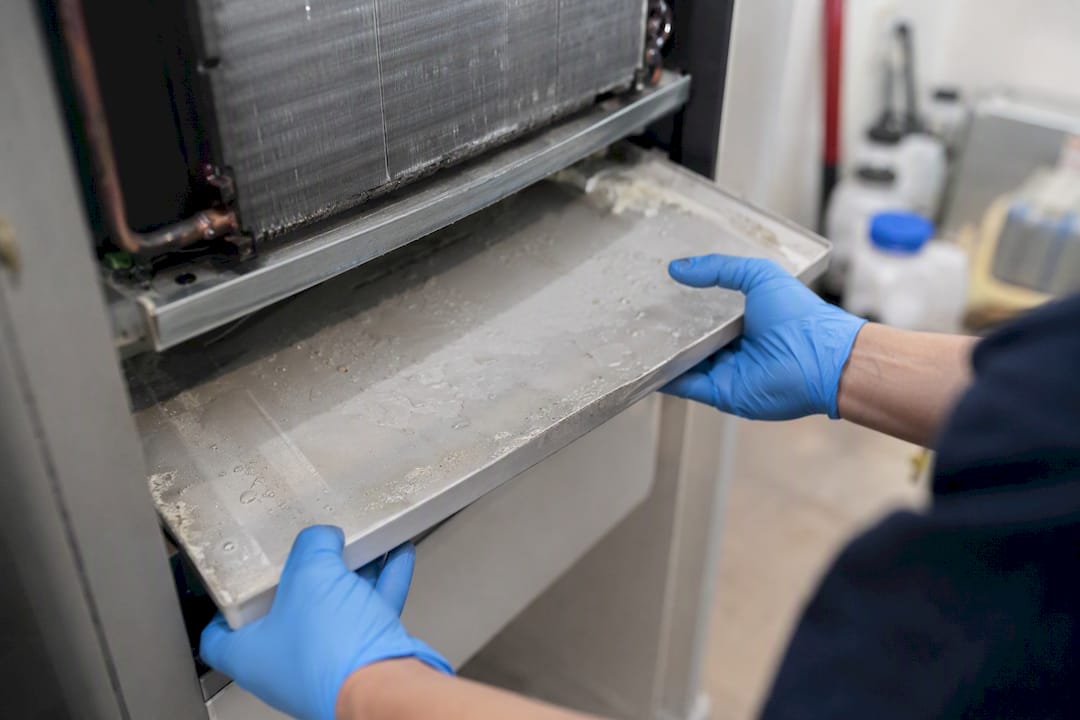
- Clear the drain. Flush the condensate line and pan to confirm free flow.
- Reassemble and seal. Refit covers and vanes, checking gaskets and screws are properly seated.
Watch for two common failure modes: bent coil fins from aggressive brushing (which chokes airflow permanently) and wet insulation left behind a cover that later grows mould inside a sealed panel. Both are avoidable with a slower disassembly step and a torch check before you close anything up.
Which tools and chemicals belong in a professional kit?
A HEPA filtered vacuum and a negative air machine should run for the entire mechanical cleaning phase, not just at the start. Continuous collection reduces cross contamination far more effectively than vacuuming in bursts.
- Soft bristle coil brushes, fin straighteners, and an air whip for stubborn debris
- Contact vacuum brushes that combine agitation with suction in one pass
- Coil detergents formulated for aluminium, applied with a low‑pressure sprayer
- Tarps or flexible capture pans, plus a wet vacuum for runoff
- Eye protection, nitrile gloves, and a respirator when working with chemical sprays
- Electrical isolation tools and an on‑site folder of MSDS for every chemical carried
Pro Tip: Keep your MSDS folder in the van, not on a cloud drive you can't open without signal. An inspector or a nervous client asking what's in the bottle wants an answer on the spot.
Always follow the manufacturer's dilution and dwell instructions on the label. Substituting a stronger mix to save time is how fin damage complaints start.
What safety and licensing rules apply to AC cleaning contractors?
Follow recognised standards and put a properly qualified person in charge of the job. NADCA's general specification recommends supervision by an ASCS‑certified professional and a system assessment before work begins, and that expectation carries weight with commercial clients and insurers alike.
- Maintain negative pressure throughout mechanical cleaning and route exhaust away from any air intake
- Never apply water or cleaning agents to porous insulation, fibrous glass, or electrical components
- Keep the vacuum running continuously during agitation, not switched on and off
- Store MSDS sheets and staff training records on site and produce them on request
If microbial contamination is suspected beyond what a dry or wet clean resolves, bring in an independent environmental consultant for testing rather than guessing. NADCA remains the reference body most contractors and clients recognise for this work.
Pro Tip: A ten‑second isolation check before you touch a cover is the cheapest insurance you'll ever buy.
How do you verify a clean actually worked?
Verify visible cleanliness first, then confirm functional performance before the system goes back into service. Visual inspection is the primary verification method; when it's inconclusive, step up to a surface comparison test or the NADCA Vacuum Test.
| Check | What to record |
|---|---|
| Visual inspection | Coil, fan barrel, and drain pan free of visible debris or film |
| Airflow | Qualitative airflow note or measured reading at supply grille |
| Temperature split | Difference between supply and return air temperature |
| Condensate flow | Confirmed free drainage with no pooling |
| Photo evidence | Before and after images, timestamped |
Pro Tip: Photograph the drain pan before you touch it. It's the single piece of evidence clients ask for most often when a callback dispute comes up months later.
Record every data point on the job sheet, not just in your head. A signed sheet with photos is what protects you if a client claims the unit was already dirty when you left.
Managing waste, wastewater and the customer handover
Capture all rinse water; never let it run into ducts, wall cavities, or stormwater. Bag contaminated debris and HEPA‑vacuumed waste separately, and retain chemical disposal records alongside your MSDS folder where local rules require it.
- Capture and dispose of rinse water per standard, not down the nearest drain
- Bag and remove all contaminated filters, cloths, and debris from site
- Hand the customer before/after photos, the completed job sheet, and a signed acceptance
Pro Tip: A folded printout means nothing next to a photo timestamped on your phone. Send both.
Running a profitable cleaning route without dropping quality
A short SOP paired with standardised job sheets and photo evidence is what actually cuts callbacks and speeds up invoicing, more than any single cleaning technique. Most disputes come from missing evidence, not bad cleaning.
- Take pre‑job photos and log notes directly in your booking system before you start
- Plan routes to reduce dead travel time between similar job types
- Set a standard time allowance per service type so quoting stays consistent
- Run a mandatory post‑job QA check before the invoice goes out, not after
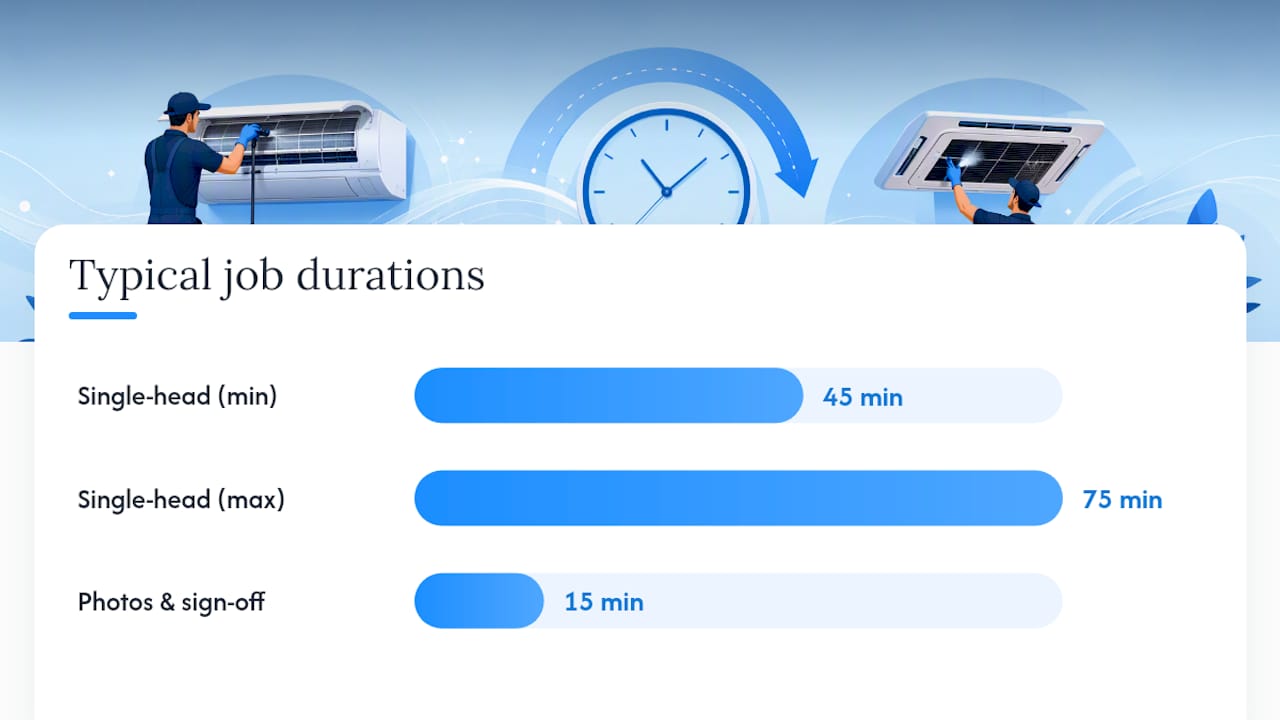
A typical single‑head split system clean runs 45 to 75 minutes once containment is set up; multi‑head or heavily soiled units take longer. Build that variance into your scheduling rather than quoting every job the same.
Pro Tip: Block 15 minutes at the end of every job purely for photos and sign‑off. Technicians who skip this step under time pressure are the ones who generate the most invoicing disputes later.
A booking and job management platform that stores photos against each job, sends automated reminders, and processes payment on the spot removes a lot of this friction. When evidence and payment happen inside the same system as the booking, cashflow and repeat bookings both improve. Tools like MOGHQ's guide to pre‑service diagnostics cover the assessment side well; pairing that discipline with digital job records is where operators see the biggest efficiency gain.
What separates reliable crews from average crews on the road
Consistency in the checklist and the evidence trail, not raw cleaning skill, is what separates a crew that gets repeat bookings from one that doesn't. Blocked condensate lines and hidden porous insulation behind an old cover are the two issues that trip up even experienced techs. Both get caught by a five‑minute pre‑service inspection, not fixed after the fact. Enforce the job sheet, run spot checks, and don't let either slide because the job "looks straightforward."
A practical option for running your cleaning business day to day
Job management software cuts the admin load that eats into billable hours, and it enforces the job sheet discipline this SOP depends on, automatically storing before and after evidence against every booking. For an operator running several routes a week, that's the difference between chasing paperwork at 9pm and closing the job before you've left the driveway.

MyAirCare gives you branded booking pages, automated reminders that bring customers back for their next service, on‑site payments through Stripe, and photo storage tied to each job record, all in one mobile system built specifically for air‑con cleaning operators. Booking pages like Pristine Aircon Cleaning or Purify Air Con Cleaning show how a clean service presentation turns into an actual booking, and Breathe Better demonstrates how automated reminders keep clients coming back every season. If you're chasing recurring commercial contracts, the tenders page is worth a look for scoping larger jobs. Set up your booking page on MyAirCare and get your next job sheet, photo capture, and payment running through one system.
Sources
- THE NADCA STANDARDACR (ACR2025)
- The NADCA guide specification
- HVAC Reconditioning for System Cleanliness and Indoor Air Quality (ACCA)